

Start in the chat
Create your Webmetic account while you connect your AI assistant and set it up in the chat, without signing up on the website and without the dashboard.
You can start Webmetic entirely from your AI assistant. You create the account in the sign-in window that opens when you connect, and you do everything else in the chat. At the end you'll have:
- a Webmetic account with a 14-day trial, without payment details
- the tracking code on your website, checked by the assistant
- if you want them, an ideal customer profile, enabled contacts, your team in the account, and a regular email with the companies that visited your website
Before you start
- Time: The account and the connection take a few minutes, and the first data arrives shortly after. The first companies appear after minutes to hours, depending on how many visits your website gets.
- Account: You don't need an account yet, because your website and your email address are enough.
- Access: You need an AI client that supports MCP, for example ChatGPT, Claude, Claude Code, Cursor, or VS Code. For the tracking code, you or your assistant need access to your website's code, to WordPress, or to Google Tag Manager. Otherwise your web agency adds the code.
- Rights: Whoever creates the account becomes the admin of the new account.
- Plan: The trial lasts 14 days and starts as soon as Webmetic first detects the tracking code. You don't enter any payment details for it.
For the first companies you only need steps 1 to 3. The assistant changes your account only when you agree, and your AI client asks before every change.
1. Create the account and connect
Add Webmetic in your AI client as described for each client under Connect the AI assistant. As soon as the client starts the sign-in, the page Webmetic verbinden opens. The page is only available in German.
- Click Konto anlegen (create account).
- Under Ihre Website (your website), enter your domain, for example
your-website.com, and under E-Mail-Adresse, your email address. - Click Konto anlegen. The page reports "Konto angelegt." (account created). Webmetic sends you two emails: your password and the tracking code.
- The page shows the Anmelden (sign in) area again with your email address. Enter the password from the email and click Anmelden und verbinden (sign in and connect).
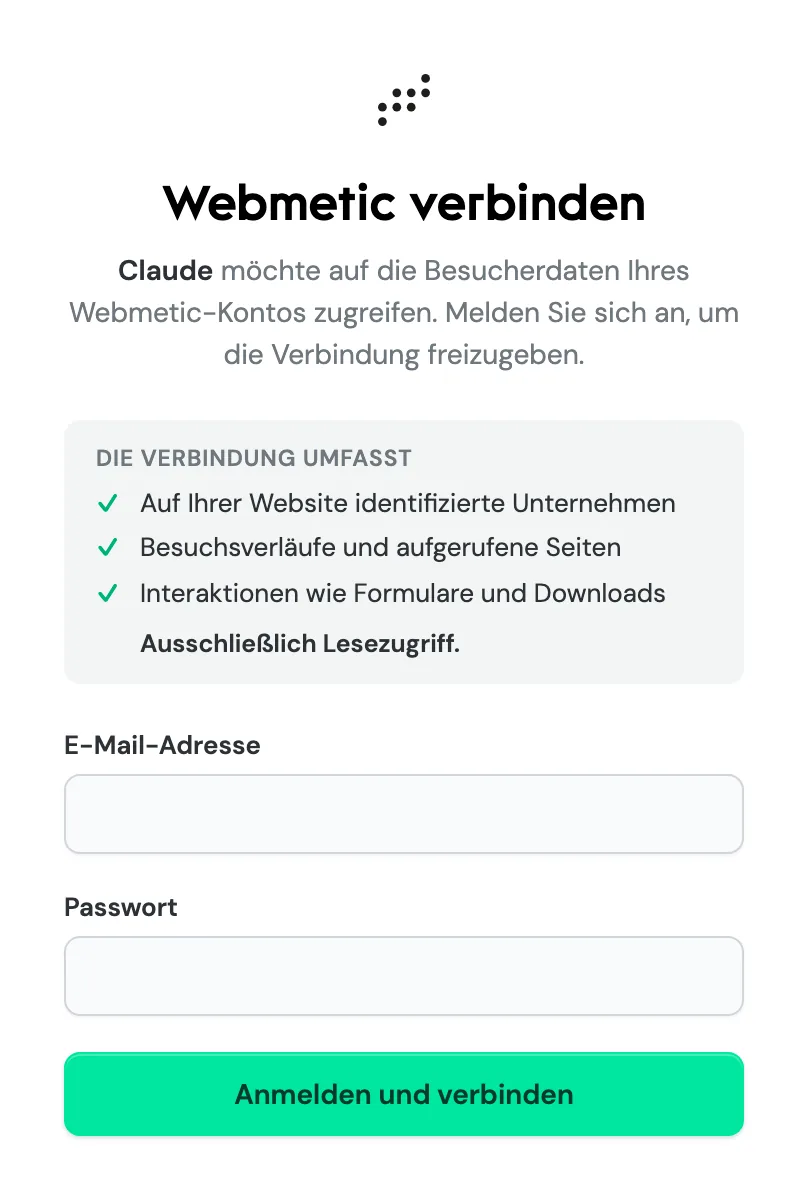
Your AI client is now connected to the new account. If an account already exists for your website or your email address, the page says so. Sign in then, or have a new password sent to you through the Vergessen? (forgot) link.
2. Add the tracking code
For the first data, Webmetic only needs the tracking code on your website. Ask your assistant:
"Give me our tracking code."
The assistant reads the account status and gives you your account's code. The code is also in the second email and belongs on every page of your website, before </head>.
If your assistant has access to your website, for example to the code in Claude Code or Cursor, it adds the tracking code itself when you ask. It shows you the change and then checks the installation. Otherwise you add the code yourself, or the assistant writes the email to your web agency for you. These guides help:
- Google Tag Manager
- WordPress
- All platforms, with the privacy notice for your privacy policy
The prompt einrichten (set up) in your client's prompt menu also walks you through this step.
3. Check the installation
As soon as the code is on your website, ask:
"Is our tracking code installed correctly?"
Webmetic opens your website in a real browser for this and checks one website at a time. The check takes up to a minute and ends, for example, with one of these results:
- Installed and loading before the banner: Everything is ready, and nothing more is needed.
- Installed, but only after consent: The cookie banner blocks the code until someone accepts.
- No tracking code found: The code is missing from the page.
- A tracking code for another account: The page carries the code of a different Webmetic account.
All results are listed under Setup. When the check passes, your account is fully set up. The first companies appear after minutes to hours, depending on how many visits your website gets. After that you ask as usual, for example "Which companies visited our website today?".
Further setup when you need it
Every further step is optional. The assistant suggests each one separately when it fits, and you can also ask for it yourself at any time:
- an email notification, while you wait for the first companies
- the ideal customer profile, when the assistant shows you a list of companies for the first time
- contacts, when you ask for a contact person
- a login for your team, when you mention colleagues or sales
Create an email notification
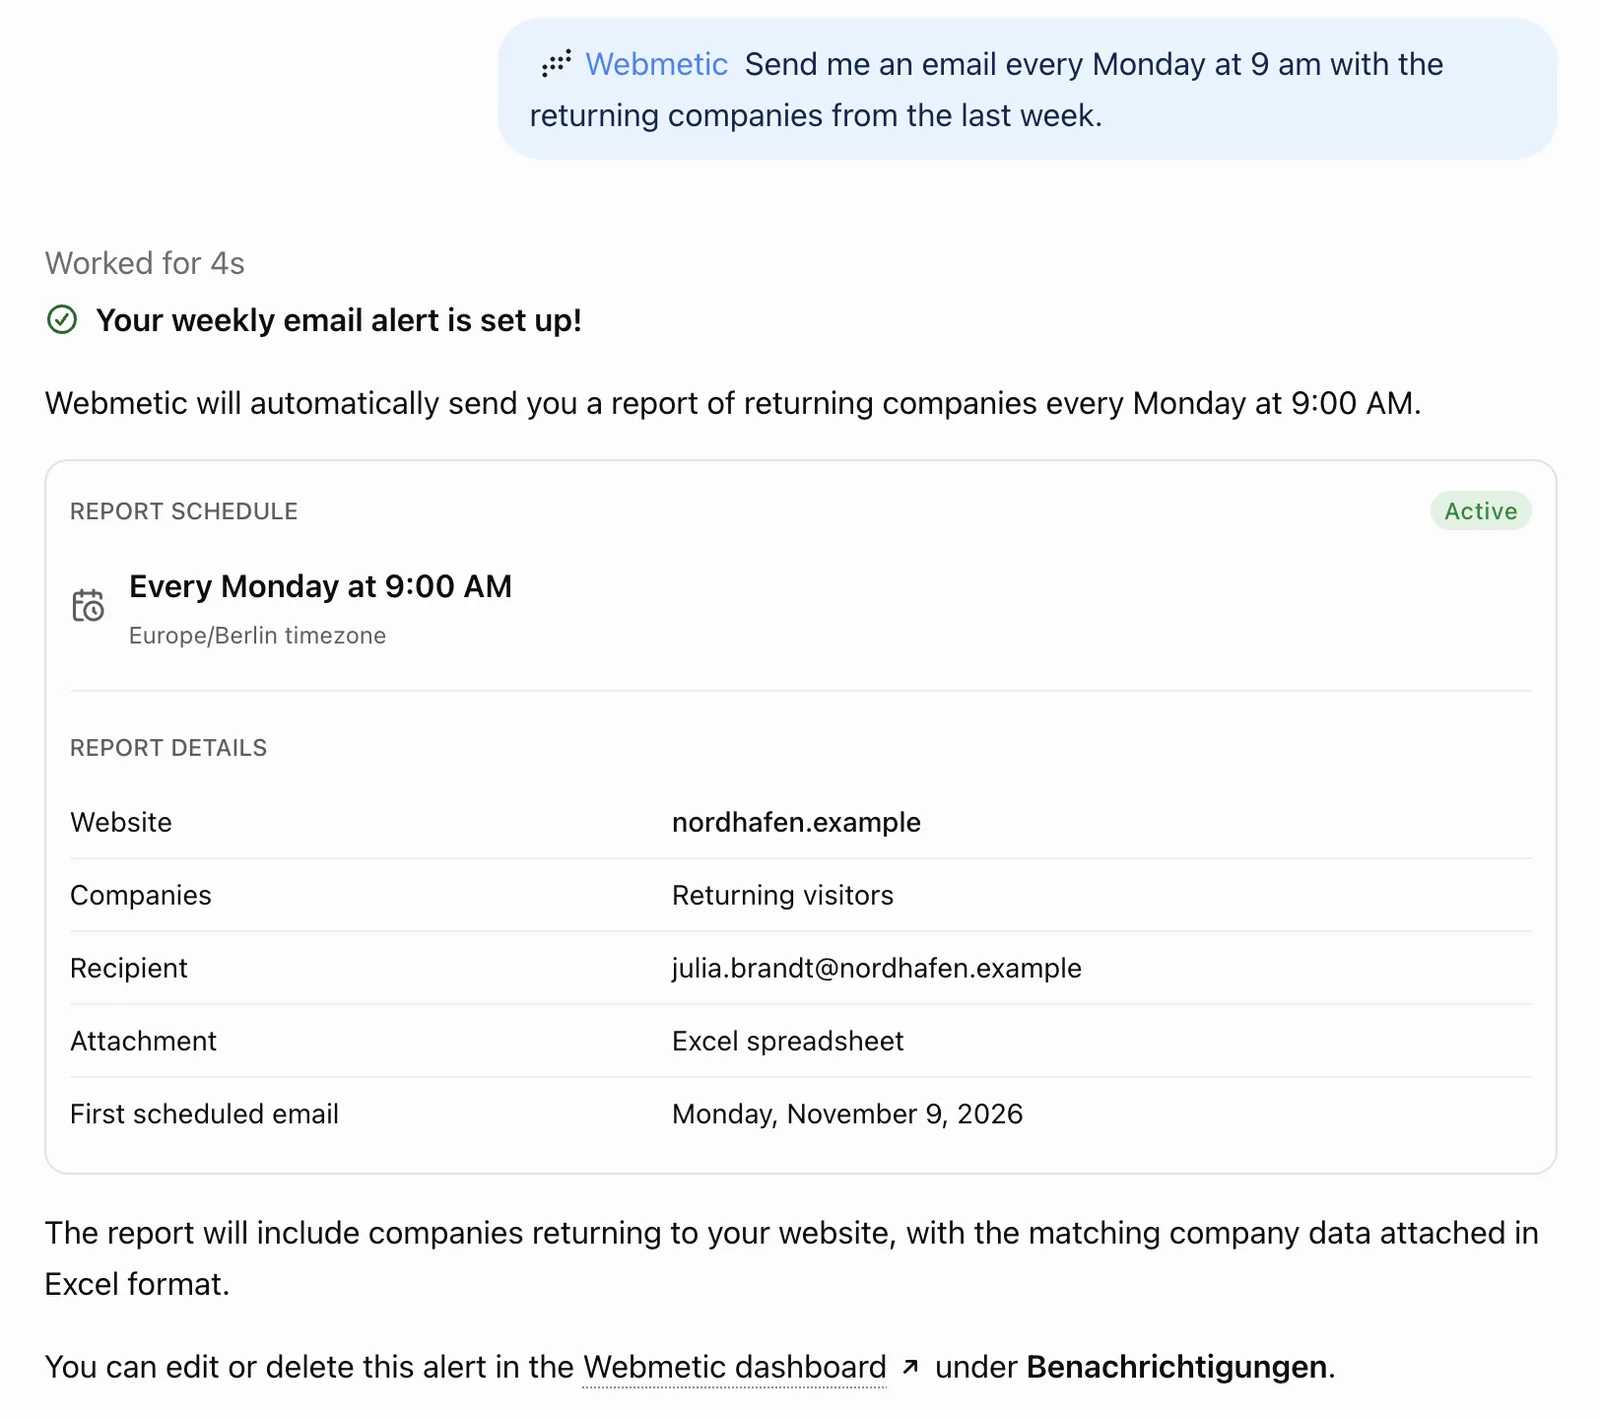
With a notification, Webmetic regularly sends you an Excel file with the matching companies by email. Tell the assistant what you want and when:
"Send me an email every Monday at 9 am with the returning companies."
You pick one of three types: new, returning, or engaged companies. You also pick workdays from Monday to Friday, a full hour between 6 am and 8 pm, and the recipients. If you don't name any recipients, Webmetic sends the emails to every user of your account. The assistant creates the notification after you confirm the details.
Set the ideal customer profile
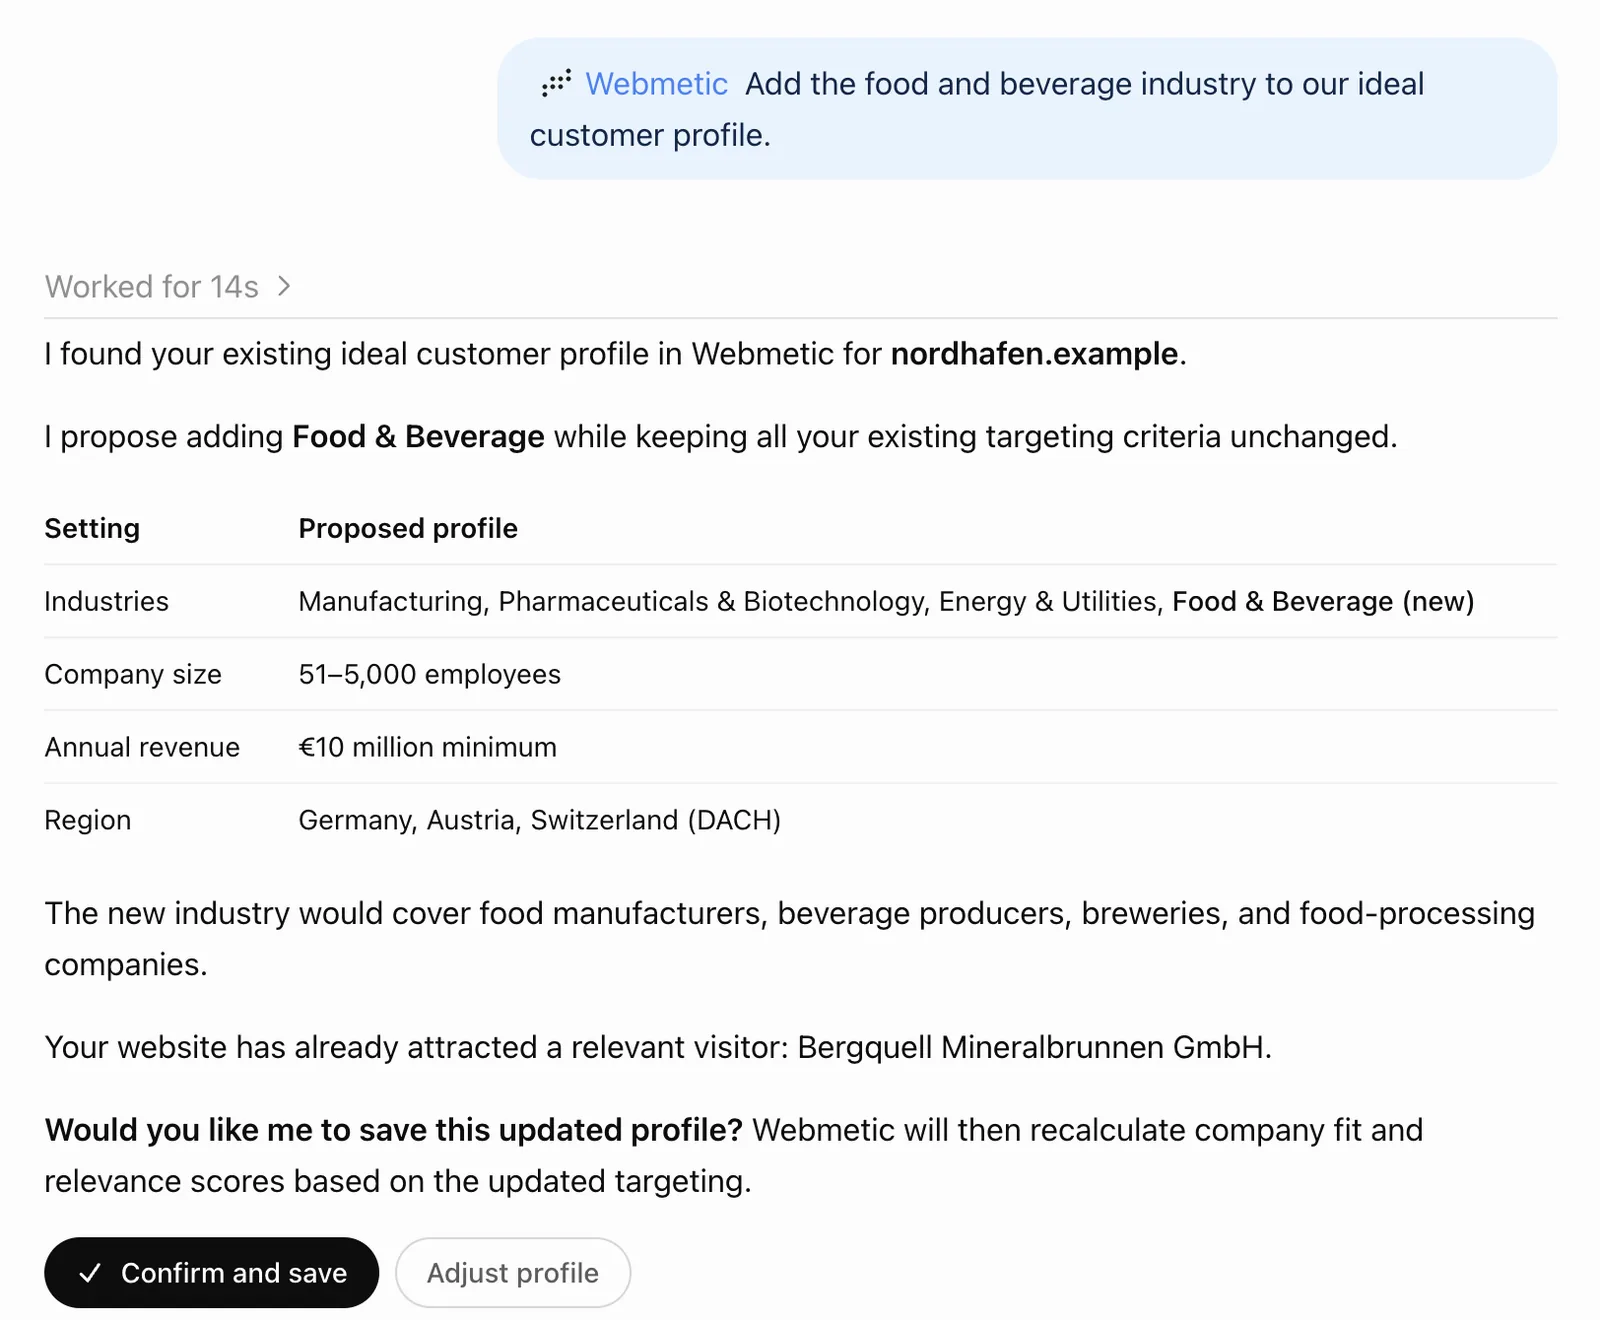
The ideal customer profile decides which companies count as relevant. Ask the assistant to create it:
"Set up our ideal customer profile."
The assistant drafts the profile from your website and your visits: industries, NACE codes, number of employees, revenue, and region (Germany, DACH, or worldwide). It shows you the draft and saves it only after your yes. Within a minute, Webmetic recalculates the relevance of every identified company based on the new profile.
Enable contacts
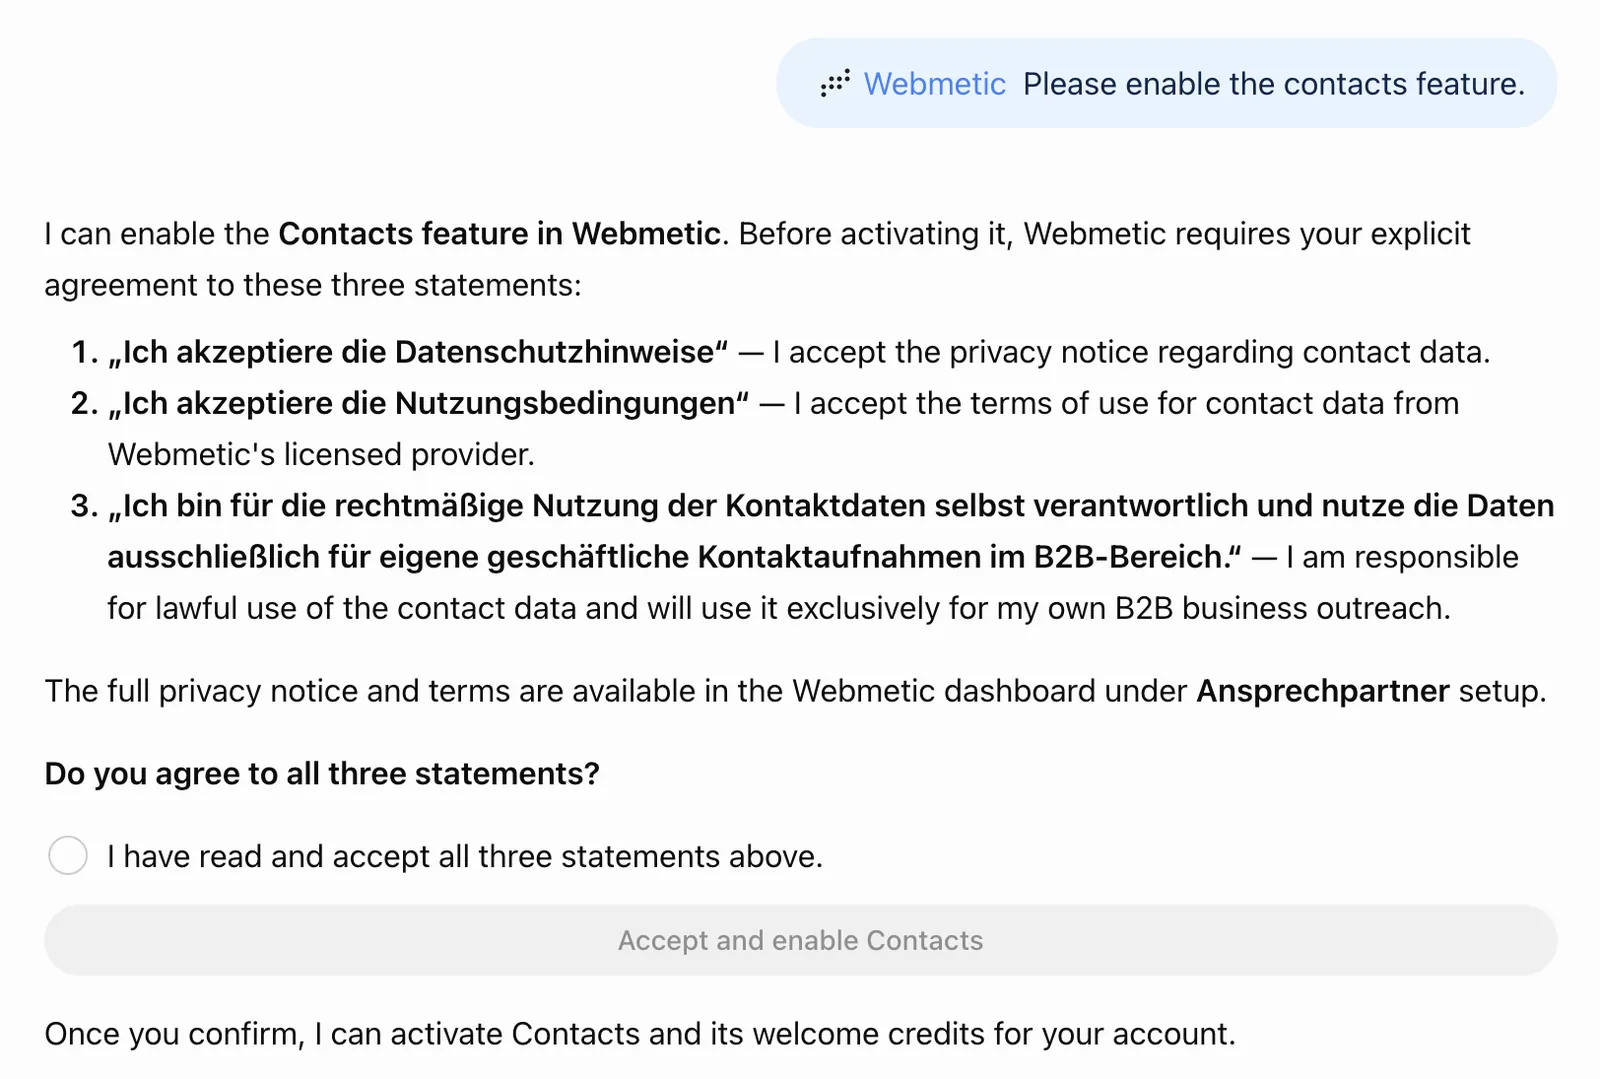
With contacts you find people at companies that visited your website. Before the assistant searches, you enable the feature once:
"Enable contacts for our account."
The assistant shows you the three consents from the dashboard: the privacy notice, the terms of use, and your responsibility for the contact data. After your explicit yes, Webmetic records the consents and credits your account once with the welcome bonus of credits.
After that you ask, for example, "Who are the marketing contacts at Bergquell Mineralbrunnen?". The search for contacts is free. Unlocking an email address or phone number costs credits, and your AI client asks first.
Invite your team
Your colleagues get their own login, which they use to connect their own AI assistant. Give the assistant the email address, first name, and last name:
"Invite Anna Berger from sales, anna.berger@your-website.com."
Webmetic adds the user with the User role and sends them the password by email. If an address already has a Webmetic login, Webmetic refuses the invitation. For more on roles, see Users and roles.
What stays in the dashboard
You still do these tasks in the Webmetic dashboard:
- payment and plan under Menu > Billing
- more websites under Menu > Websites
- the domain blacklist
- editing or deleting users and notifications
If a partner manages your account under their own name, they set up users and notifications.