

Claude
Connect Claude on claude.ai and in Claude Desktop to your account through a custom connector.
Claude on claude.ai and Claude Desktop use the same connector, so you set it up only once. The free Claude plan allows exactly one custom connector.
In Team and Enterprise organizations, an Owner adds the connector under Organization settings > Connectors and selects Register automatically. You then click Connect next to Webmetic under Customize > Connectors.
What you need beforehand is listed under Before you start.
-
In Claude, open Customize > Connectors. Click + Add, then Add custom connector.

The Connectors page in Claude with the Add menu open and the entry Add custom connector -
Enter "Webmetic" as the name and this address as the server URL, then click Continue:
https://mcp.webmetic.de/mcp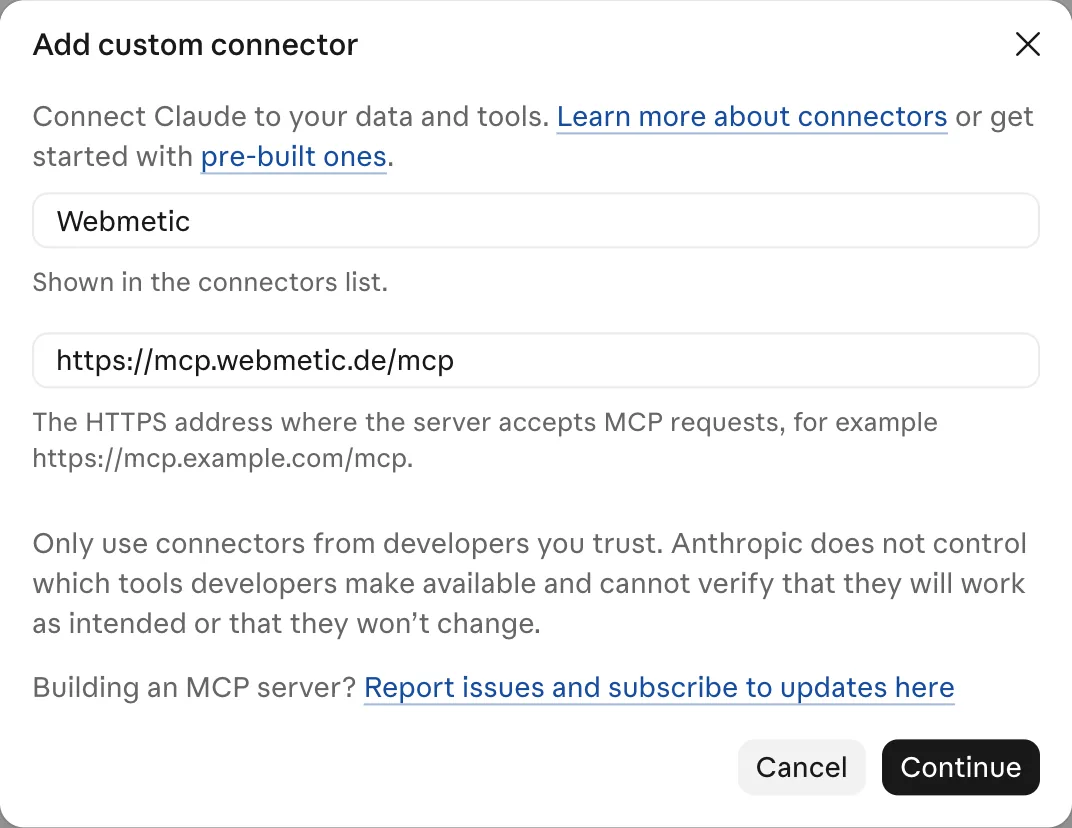
The Add custom connector window with the name Webmetic and the server address -
Claude detects the sign-in settings by itself and selects Sign in now under Authentication and Register automatically under OAuth client. Keep both, because Webmetic doesn't support Use Claude's published identity. Click Add.
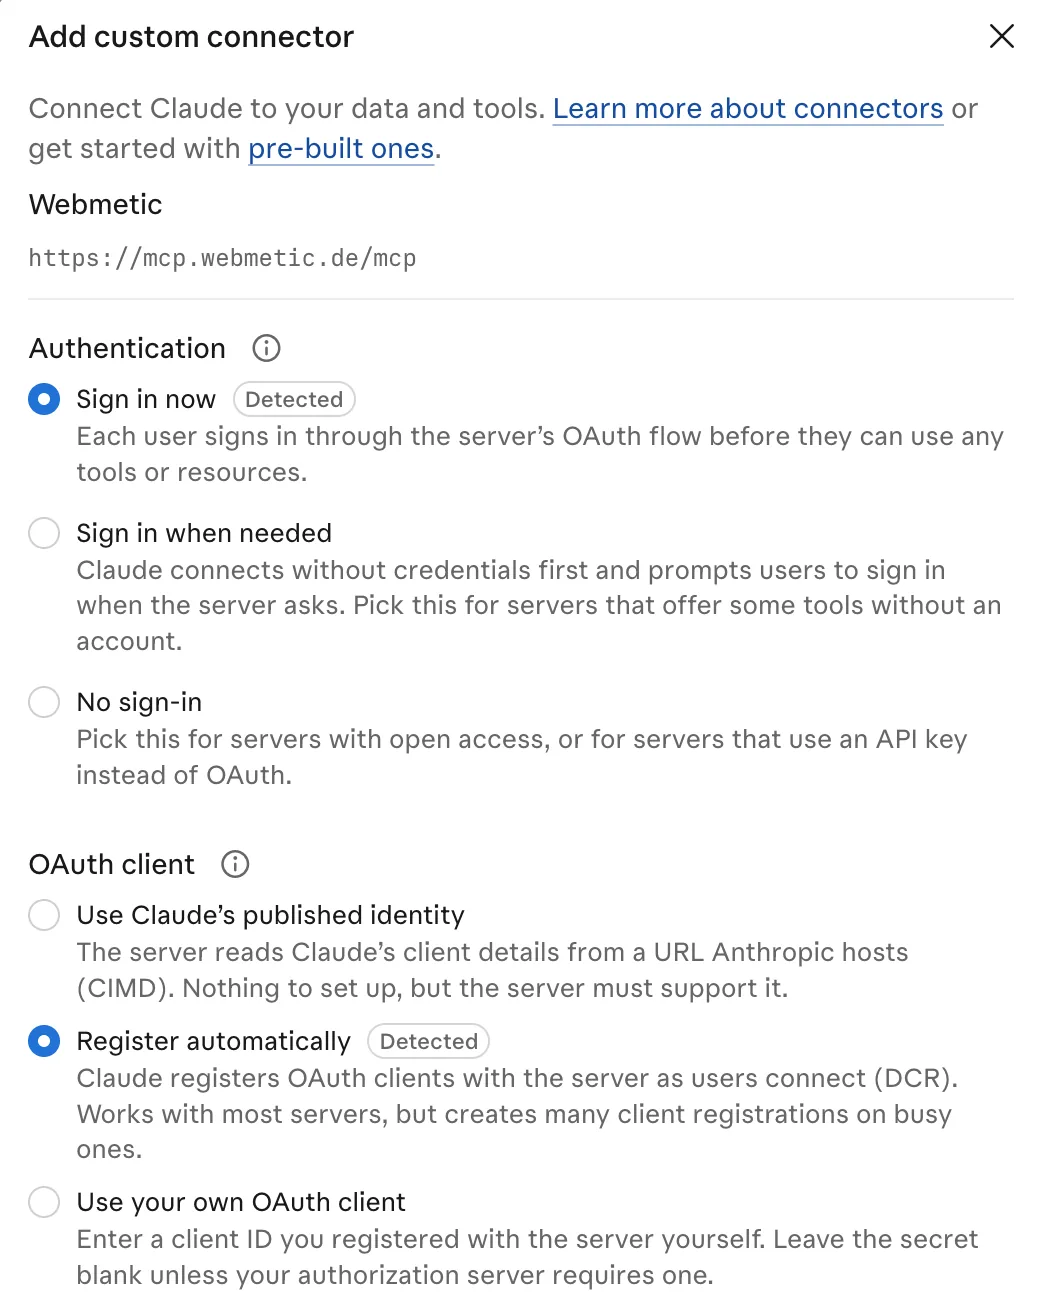
The second step with Sign in now and Register automatically, both marked Detected -
If the sign-in doesn't start by itself, click Connect next to Webmetic. The page Webmetic verbinden opens.
-
Enter your E-Mail-Adresse and Passwort and click Anmelden und verbinden. Claude is now connected to your account.
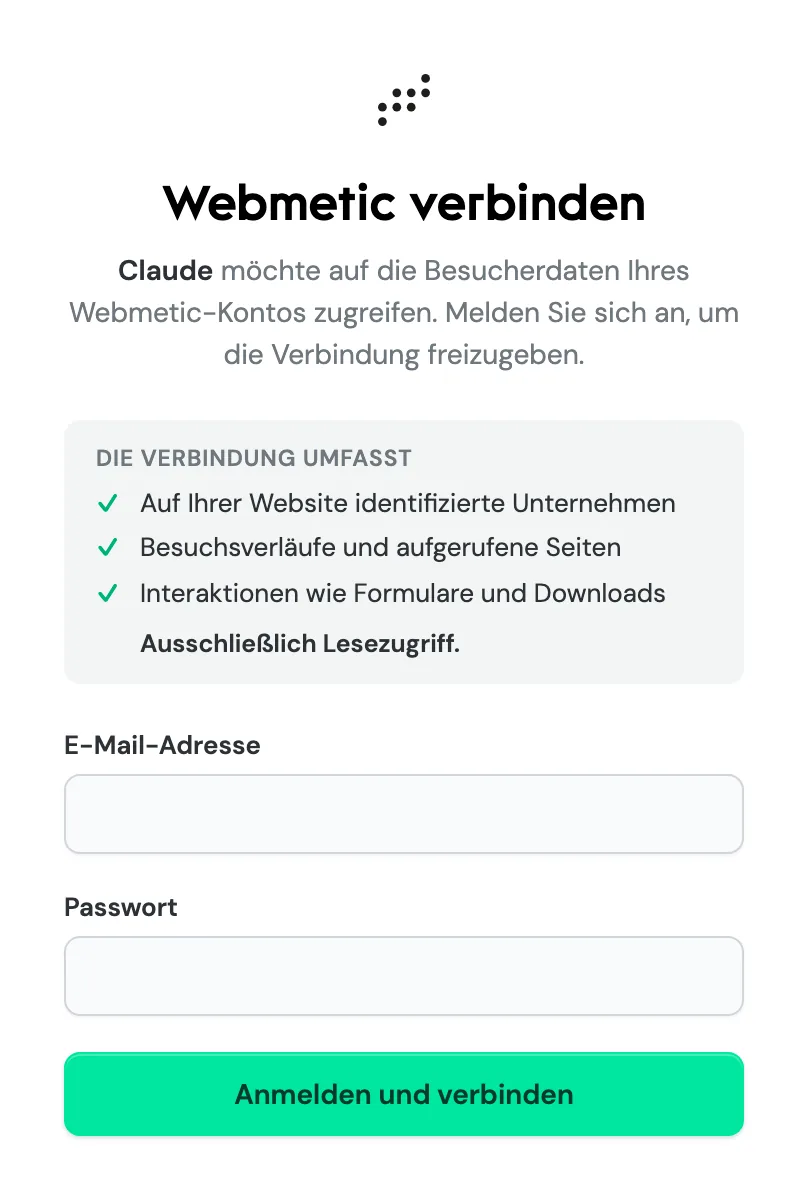
The sign-in page with the tabs Anmelden and Konto anlegen
In a chat, you turn Webmetic on or off under + > Connectors.